Showing posts with label Pearls. Show all posts

8/11/2013

Almost Alice Cupcakes from Christinamachtwas


Dear lovely readers,

I´d like to introduce myself. My Name is Christina, I´m a friend of Anna and a blogger myself. At Christinamachtwas I share with you my latest recipes, my thoughts and so much more. Take a look, but first I´d like to show you my Almost Alice Cupcake that I created just for my lovely Anna.

For the inspiration I took a picture that Anna posted a few posts back. It´s this one:


I thought it would be perfect for a Cupcake, and I was right. They´re terrific, aren´t they?

You will need for 6 - 8 Cupcakes:

Ingredients:
200 g Flour
1/2 Ts Bakingpowder
1/2 Ts Natron (Bakingsoda)
1 pinch of Salt
 70 g Butter
100 g Sugar
1 Egg 
75 ml Milk
2 Hands full Berrys (Blueberrys + Red Currant)
1/2 Lemon


Directions:

Mix together flour, bakingpowder,
bakingsoda & salt.
Whisk butter and sugar until it´s fluffy.
Add the egg and the milk to the buttermixture
and whisk until it´s comined.
Now add the flourmixture and
only use a wooden spoon to combine.
    It´s not bad if there are flourflakes in the batter!
Now add the berrys and gently fold them in.
If you like you can squeeze a little bit of
the lemonjuice in the batter.
Fill it in papercups and bake at 180 °C about
12 - 15 Minutes. Make the "chopstick"-test.
Let them cool completely.


And for the frosting you´ll need:


Ingredients:

250 g Mascapone
1 Package Cream Cheese
2 - 4 Ts Powdersugar
Food dye in teal and blue

if you want: Sugarpearls in black

 Directions:

Whisk everything together and 
garnish the Cupcakes with it. 
                                  Add Sugarpearls to the frosting and enjoy!


I hope you liked my little sweet Almost Alice Cupcakes & I would be pleased to welcome you to my blog as well. 



3/01/2013

How to: Multi-layered pearl necklace


Cut your chain & pearl string in a desired length.
Add jump rings to the ends of the chains. Then attach a clasp.


2/09/2013

How to: Pearly Chain Necklace


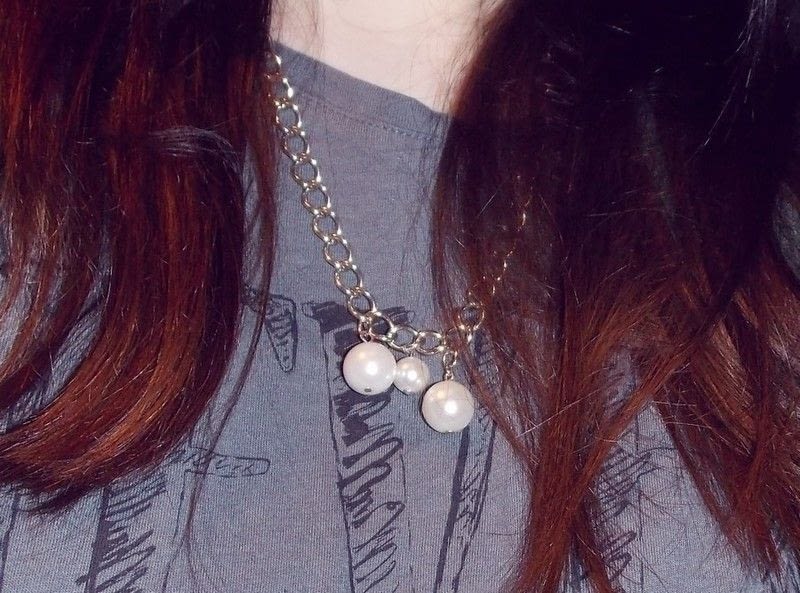
This is my favourite necklace at the moment! It matches so many outfits... And it's very simple to do!


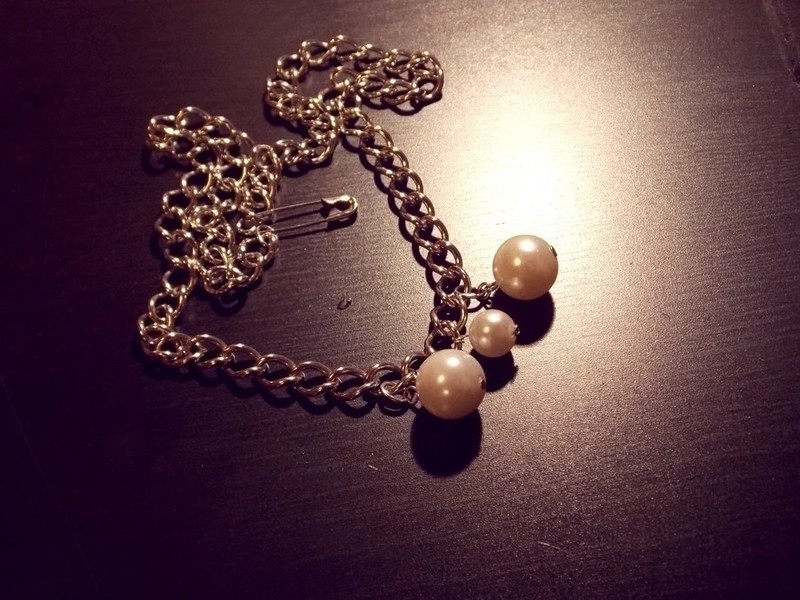
Find a chain in the length you need for your neck. 
For the closure I used a safety pin. Trashy, I know, but it was the best choice in this case ;)


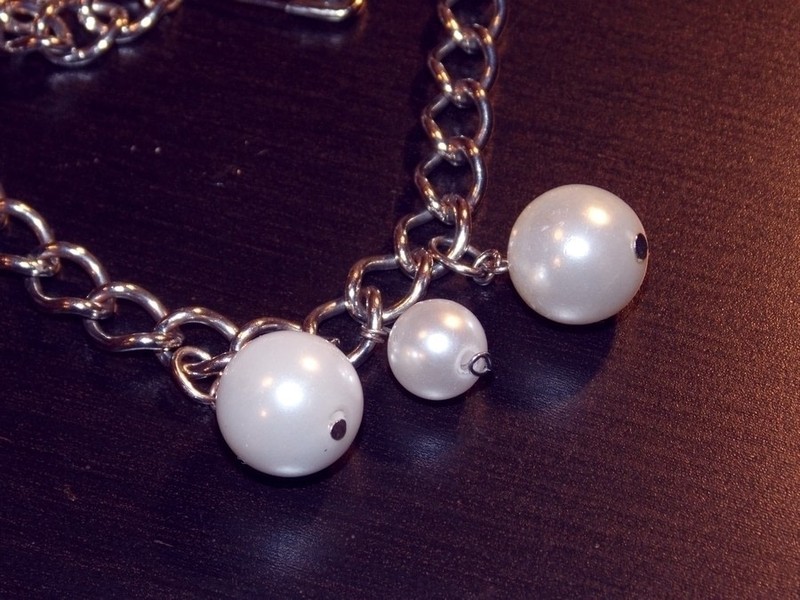
Add pearls to the chain. 
I used wire and the metal that was already attached to the pearls.

That's it! You can also add way more pearls like the guys on Pinterest:


...But I wanted a more simple look as I experienced myself to be less likely to wear overdone jewellery in everyday life. I like it, I just don't happen to wear it.

11/17/2012

How to: Pearl ring

It's weekend which means I'm studying, but before I start I wanted to share a little How to with you, since I hadn't written one for a week :D


As to the other bow ring in the picture, I made it afterwards and photographed them together. It's only a detachable bow from a broken earring I wanted to reuse. Nothing to do with the pearl ring! ;)

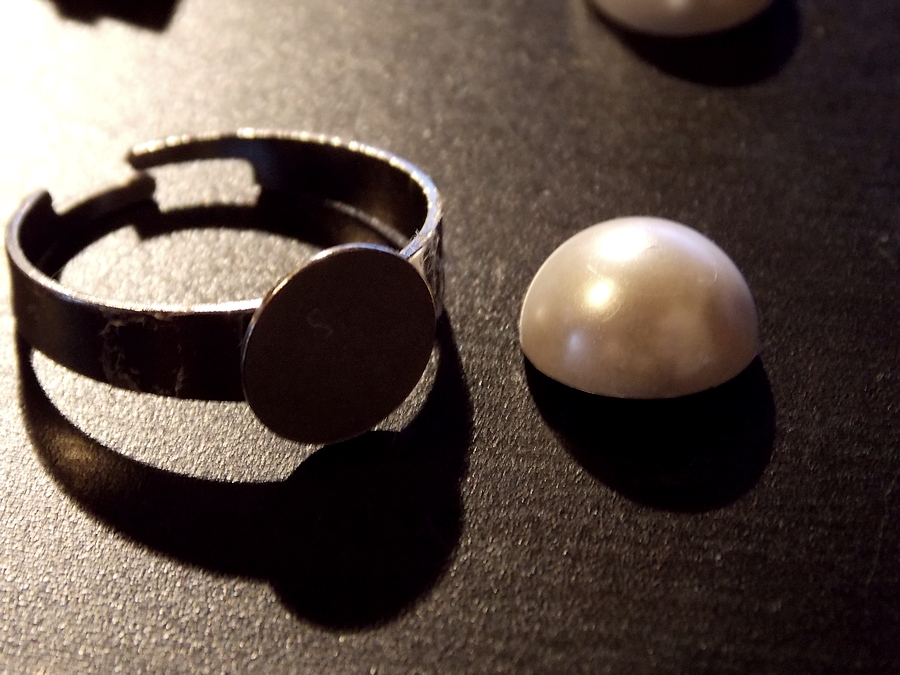
You'll need a pearl button (I had them somehow), a hot glue gun (what else) and a ring base.

Remove the loop thingie with the help of scissors. My buttons were soft plastic so it worked easily.
Get a ring base and glue that half-pearl onto it.
Wear.
If you liked it, there's another similar pearl jewelry how to coming up soon :)

Have a nice weekend!


8/31/2012

How to: Sea shell & pearl necklace


1. Make a hole into the top of the shell. Mine was already there. I think it's also possible to just glue the ribbon on...

2. Glue in the pearl with hot glue.


8/21/2012

How to: Wrapped pearl bracelet


After wrapping wool thread + satin ribbon around my belt bangles, I tried it on an piece of old studded belt (without studs because I used them for other things) and liked the outcome.


This is made of: old cheap belt (cut), satin ribbon (wrapped around), attached magnet closure & a piece of pearl necklace. I think the steps are pretty clear.