Showing posts with label Home Decoration. Show all posts

6/22/2013

Map box. (More map things!)


Yay for geography! Sooo I did it like the people on Pinterest and wrapped a map around a little cardboard box. No more to say :)


6/17/2013

How to: Twigs with recycled leaves


Do you believe I couldn't manage to come up with a better title? I can't give it a short, snappy name! 
I saw something like this on Pinterest and instantly fell in love with the idea. I had to give it a try! It's sooo simple!


Here's how to do it:

Collect some twigs. Gather old magazines and cut out leaf-shaped pieces.


Attach them to the twigs using hot glue or sellotape.

Bind together and find a matching vase and LOVE because it's long lasting and looks too cute :)


6/10/2013

How to: Map heart garland


Yay, geography!Is there anything more beautiful than atlases & maps?
Bought a second hand atlas for this and some other projects (As I already announced on my Facebook-page facebook.com/almostaliceblog - feel free to 'like' it for immediate updates. Also, google reader is going away so if you're following me via that, I recommend following my facebook!) 


Here's how to to it:

You'll need an old map or atlas, a sewing machine, scissors, a pencil and a heart template you can find on google. The whole thing took me about 30 minutes.


Print out a heart template from google, there are many different versions of hearts.
Use it to cut out hearts from a map or the pages of an atlas.
Try to vary different looks - land, ocean, mountains,...

Put your hearts into pairs. You can, for example, add an ocean dominated heart to a mountain dominated heart.


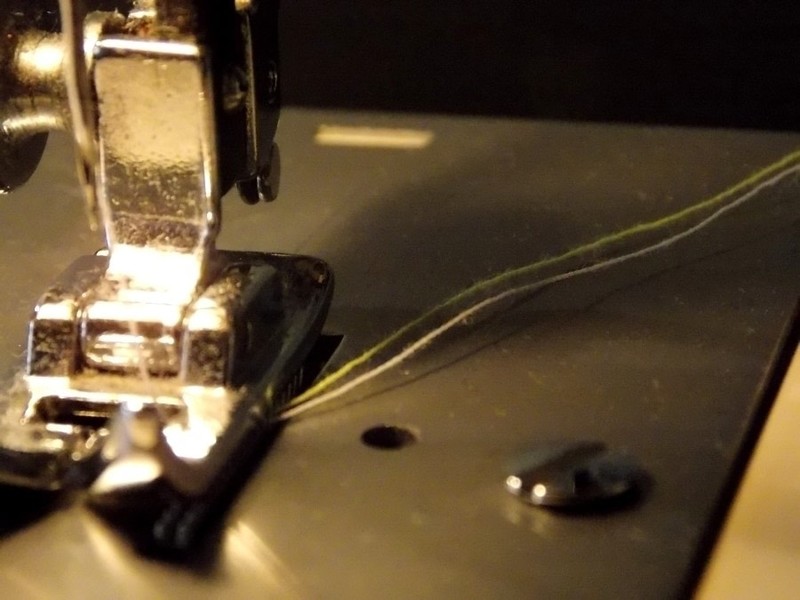
Prepare your sewing machine: Try to use thread in a matching color. Mine was green & white.


Now the tricky part: Start sewing in the middle of the first heart and work your way to the end.


Now you keep sewing about two stitches, pull up the presser foot and carefully pull the heart away from the machine. Take care that your thread doesn't get too long.


Start on the next heart and keep going :)


Lucky you, you're done!
Of course you can add even more hearts or simple round shapes.
Now hang up and enjoy!

5/17/2013

How to: Painted twigs


Cheaper than flowers & long lasting!
I love them, I wish I could make more but at some point it gets weird having them all over... :D
I just played around with the colours I had at home. I had to paint two layers and used acrylic paint.


4/13/2013

Update

Hi everyone,

I wanted to give you a little update on what I'm up to recently.
Semester break from uni is nearly over and I'm currently busy reading books for preparation, working out and shopping excessively after having saved loads of money because I was busy working out. Sounds confusing maybe. Anyway, what I haven't done in a while is crafting which you might've noticed because all you're seeing here is Inspirations of the moment, Things I love etc., but no tutorials really.


Btw - next to my Kindle eBook (with Game of Thrones on because I have to read it) lies a brand new necklace I bought last weekend, I love it. It was the kind of necklace I wanted for months but couldn't manage to create. It's made of metal and leather, and sadly I'm not trained in working with metal... But I hope to find time soon for trying to copy the shape of it - for new necklaces. And yeah, I'll share the pattern with you!

But here's something new anyway. Half a year ago, I painted the tops of some little jars which I use for my craft supplies. I haven't shown them yet. Here are two of them:


I decided to paint them with nail polish and acrylic paint in fruit patterns. Maybe that's an inspiration to you. :)

I can't tell you when I'm back on crafting track again, I hope soon. Apart from that, I have a spring jacket and a vest I made I HAVE to show you! But I couldn't take proper photos yet :(

Have a nice weekend!

12/15/2012

Christmas Special Part 3: Christmas present DIYs

Welcome to part 3 of my Christmas special: Christmas present ideas.
Speaking about myself, making my own stuff is not only refreshening my soul but also a great opportunity to show beloved ones they're worth the time I put in crafting. I already planned on some stuff which, unfortunately, I can't show you in case some guys are spying. :P
I like this idea, especially for creative people. It's cheap, though I wouldn't think the idea is cheap.


You don't need to be a genius to make those slipper. Craftynest.com shows you how. You just need time.


Can you crochet? I tried and failed because of lacking patience :/ But these owl coasters are just adorable! If you can make them, would you mind sending one to me? Oh come ooon.. please!


Maybe something for your mom. I assume they're easy to make! Check out http://media-cache-ec2.pinterest.com/upload/230879918366517358_lOjCidoY_c.jpg

Wanted to make one all the time. Maybe now? This is from http://media-cache-lt0.pinterest.com/upload/253820128968453567_dEMOIVrY_c.jpg


Need gift boxes? Nothing easier than that. I can't remember how many patterns I found on that. Here's one of them: http://www.designsbymeganturnidge.com/blog/?p=935


The diy bride had a great idea of envelope liners to make your envelope more personal. Nobody will throw that away...


More coasters! This one was posted on my favourite craft website, cutoutandkeep.net! I really thought about making some. Follow the link for a How-to.


I love this idea of a bow. But I don't know the source...


I hope you can use somet of these or maybe at least one. I would make them all. If I had time.


12/12/2012

How to: Fruity coasters (Yay!)

Put your glass down on grapefruits, oranges, lemons or limes! :)


I made these for my aunt for Christmas.
Here's how I made them:

1. Start with the base for the coaster, it's made of thick felt (mine is white) and the diameter is 8,5 cm.
2. Then you cut out another circle with the same measurements, in the colour of the wanted fruit (orange for orange, yellow for lemon, etc. ...).
3. Cut out another circle (diameter: ~7cm) out of white felt (!). Then handsew it onto the (e.g.) orange one from step 2. Right in the middle.
4. Now cut out triangles (mine were 2,5cm from peak to 'bottom'), seven pieces in the colour of the felt from step 2.
5. Sew the triangles on the base from step 2+3:


6. Now take the whole top and handsew it on the very base from step 1! On the white back, it should look like this now:


7. Now put some glue between the gap of (e.g.) orange and thick white felt on the edges.


Maybe I could inspire you with this. I just love the idea.


12/08/2012

Christmas Special Part 2: DIY Link Gallery

Christmas is coming. Whether that stresses you out or you're looking forward to it, my DIY Christmas gallery is worth a glimpse.

Christmas DIY links

Good housekeeping.com shows you several ideas for christmas decoration. I like the first one - styropor balls wrapped in fabric, so easy but cute!


These clay feathers aren't technically christmassy but would make great gift tags!

Making snow globes is actually super easy. Get a jar, glue an item (in this case, a snowy fir or other tree) on the inner side of the lid, pour water into the jar (+fake snowflakes), screw the lid on the jar.

Got some old Christmas bulbs left? Eddie Ross shows you what to do with them.


Love to bake? Here are some Christmas cookies ideas:


I was impressed by those cutting techniques for paper snowflakes:


Hope you liked it!